Fortigate integration - RADIUS
- Georg Johansen
- Lise Kristoffersen
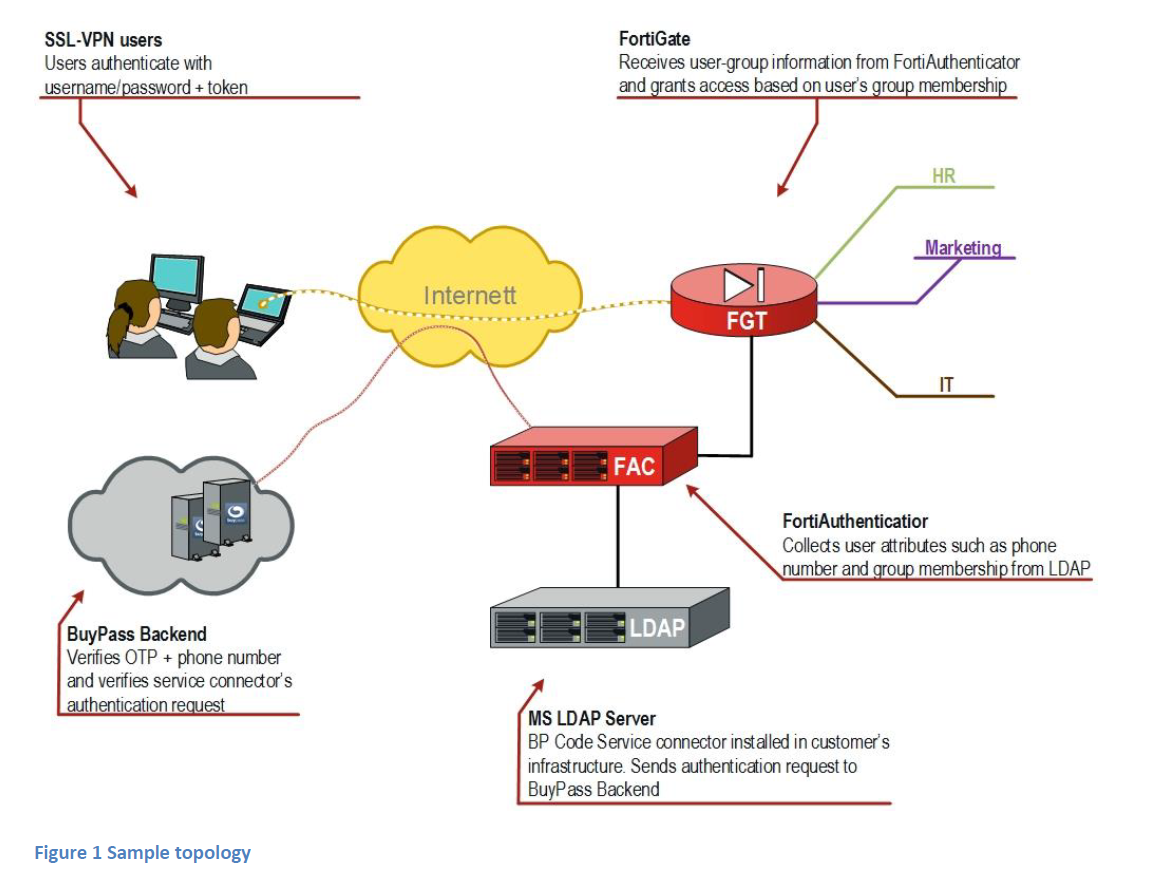
Topology
FortiAuthenticator configured as a RADIUS server and connected to LDAP and FortiGate.
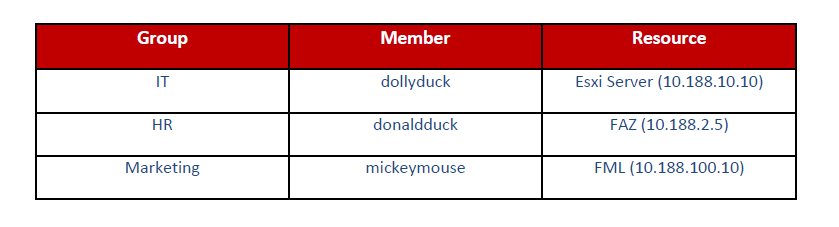
The configuration discussed in this document was tested with the following setup for users, groups and memberships:
Software versions
The configuration discussed in this document was tested with the following firmware versions:
- FortiAuthenticator GA 6.0.1
- FortiGate 6.2.0
- Windows Server 2016
- Windows 10
- Buypass Code Service Connector
- Buypass Code token App for mobile phone
Prerequisites
This documentation is based on Buypass Service Connector already installed on MS LDAP Server as well as the necessary users and groups defined in the customer's AD domain structure.
FortiAuthenticator basic setup
- Configure IP and DNS on the FortiAuthenticator
Configure Remote Auth. Servers (LDAP)-
- Go to Authentication → Remote Authentication Servers → LDAP and select Create New
- Enter the remote LDAP server information
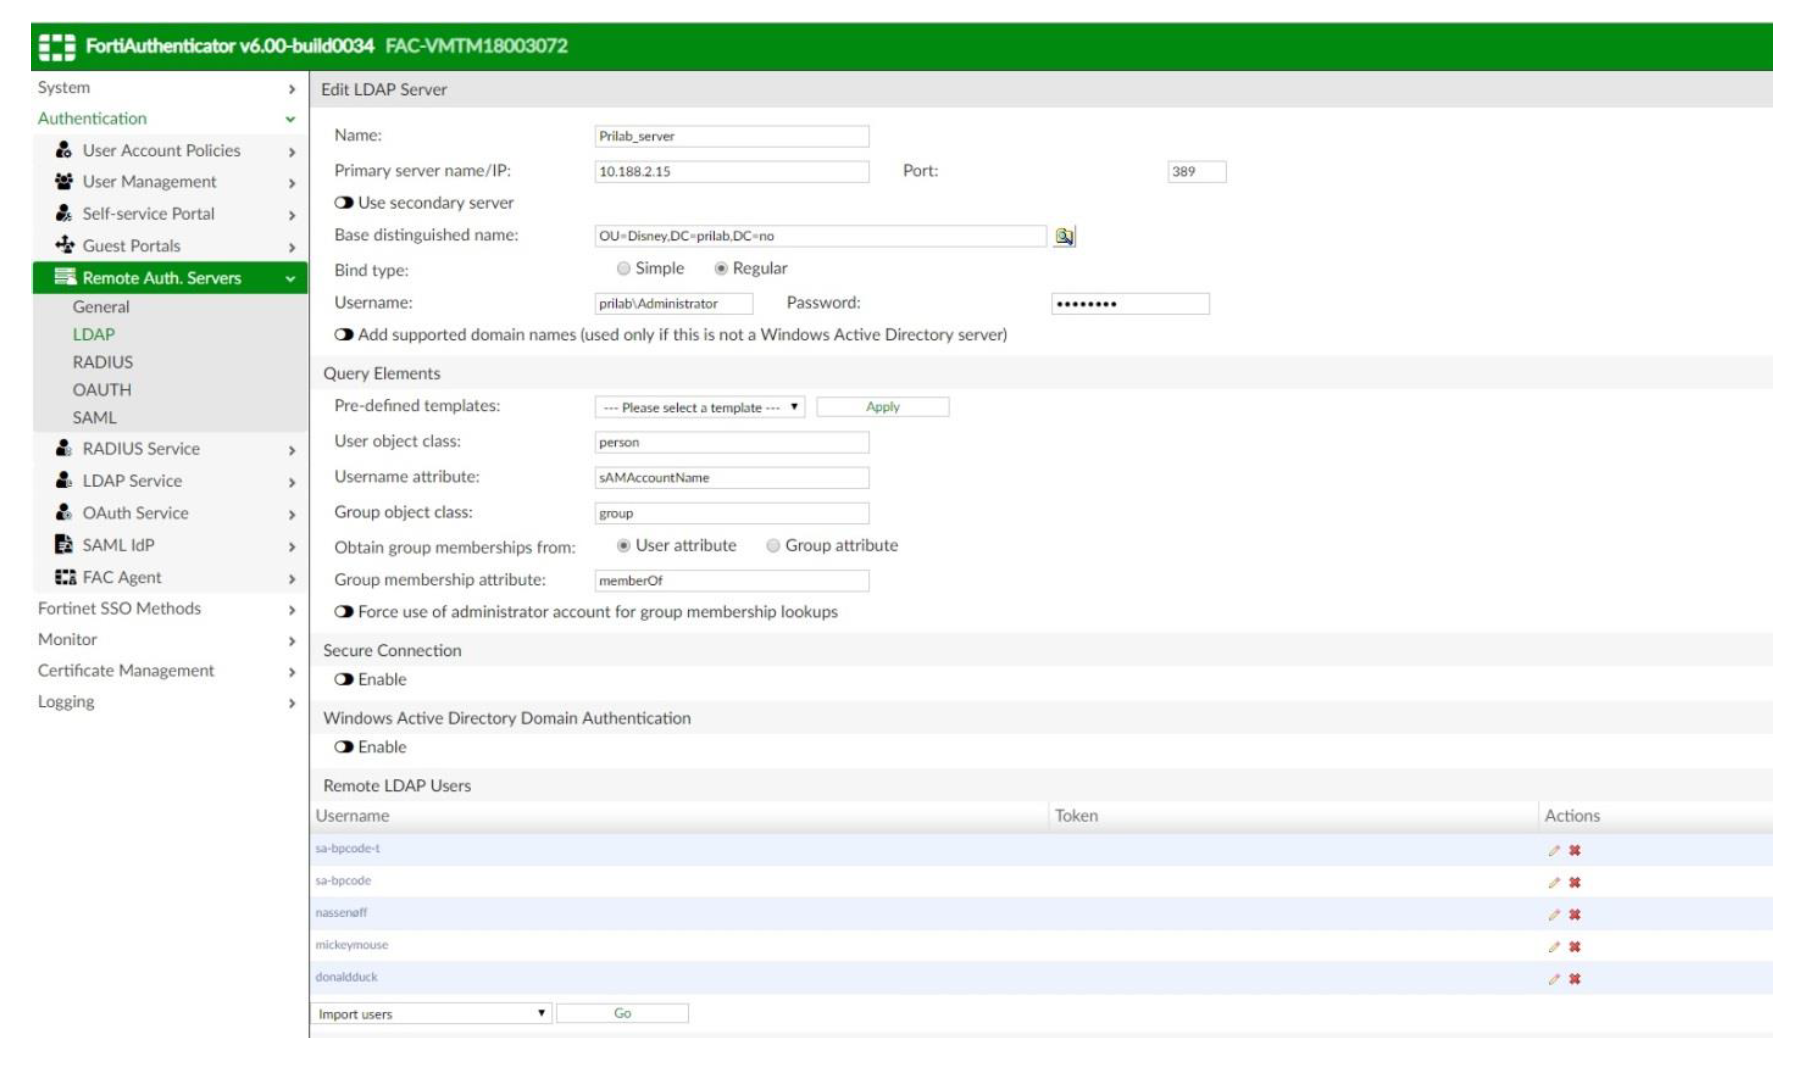
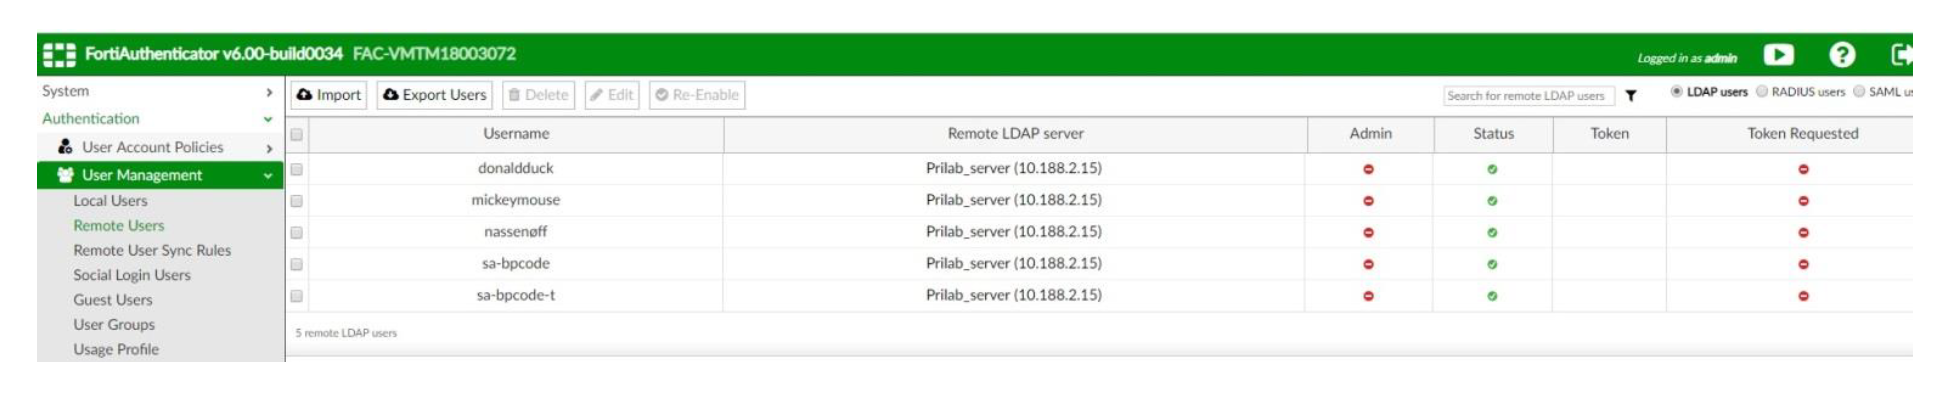
- You should be able to see the LDAP user replicated under Remote Users
Create User Group
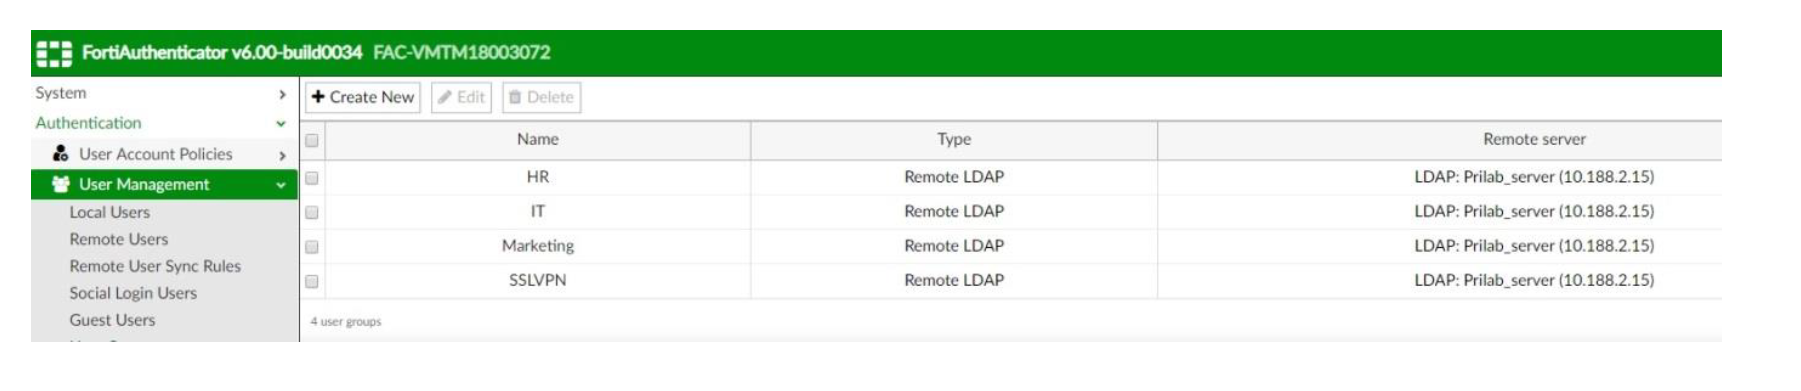
- Go to User Management → User Groups → Create new
- Select Type Remote LDAP
- User retrieval: Specify an LDAP filter
- Remote LDAP: Select a remote LDAP server
- LDAP filter: Specify a filter and Test Filter to verify the correct user(s) in the group
- Radius Attributes → Add Attribute. Vendor: Fortinet, Attribute ID: Fortinet-Group-Name.
Value: HR(repeat the above steps for all the necessary groups, in this case HR, IT, Marketing SSLVPN)
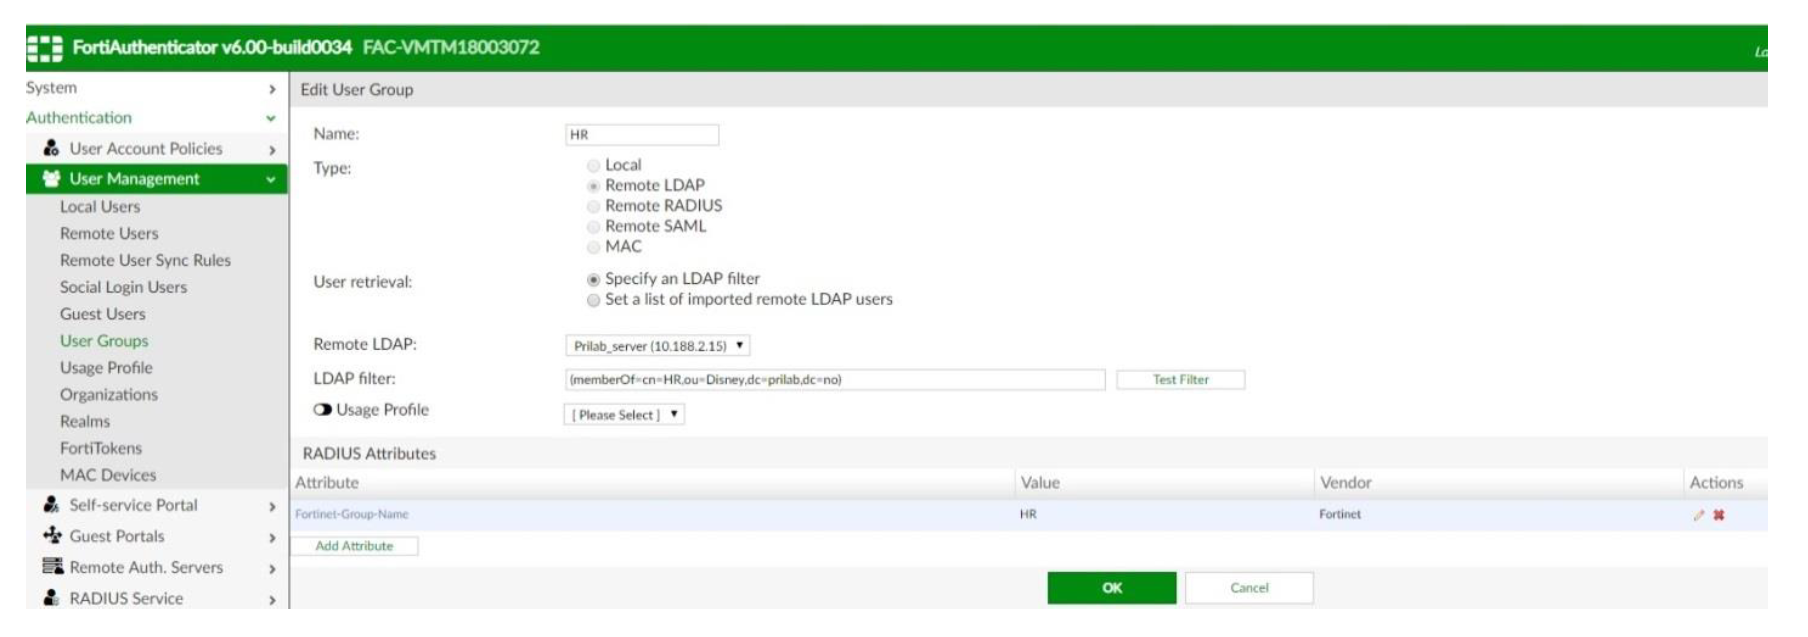
Note - the Value for this attribute (HR in the above example) is the attribute sent with every user member of the LDAP group specified, and this is what FortiGate uses to match users against its local group.

Remote Authentication Servers
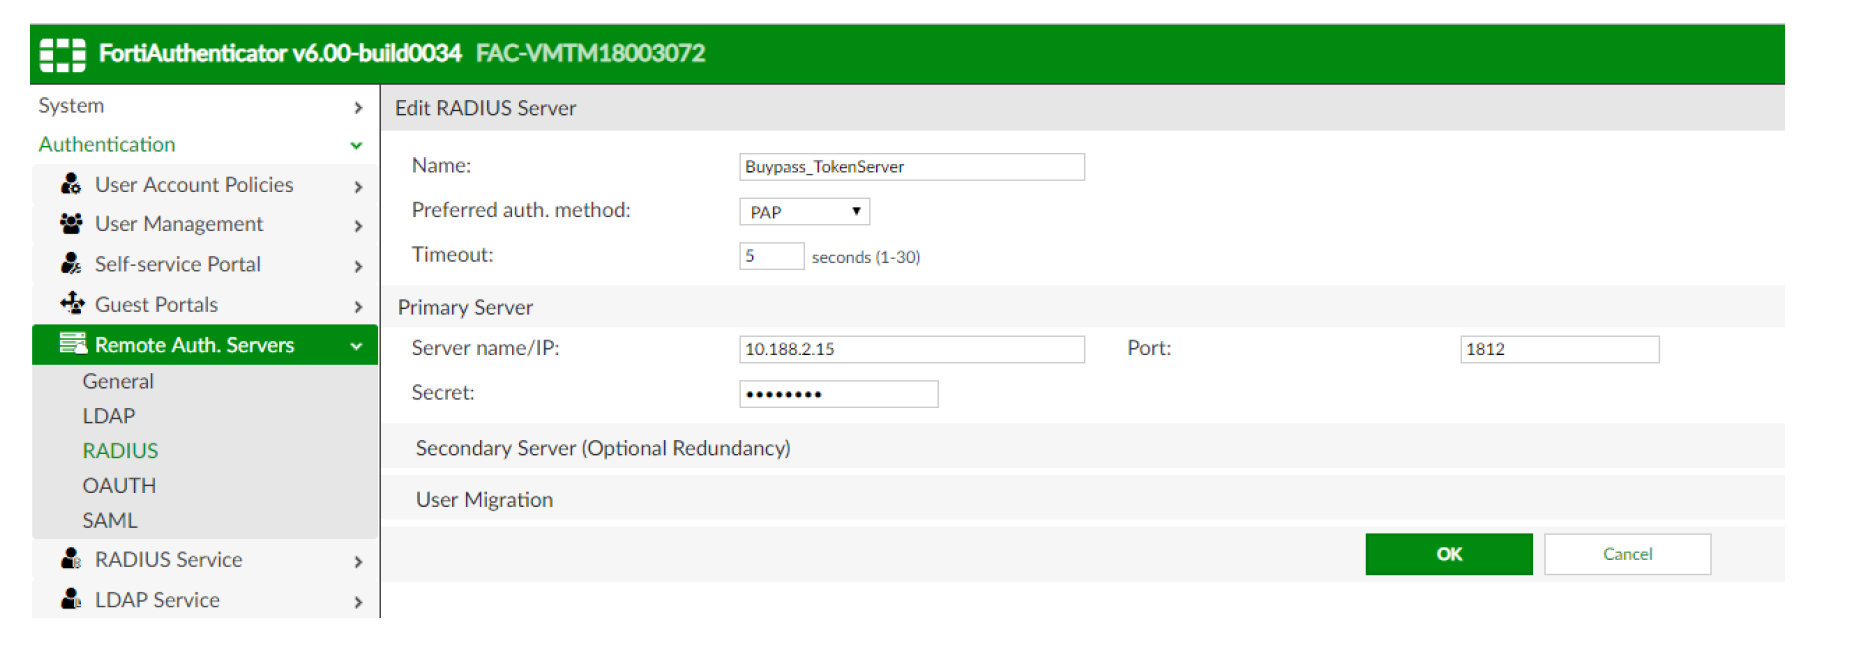
- Go to Remote Auth. Servers → RADIUS → Create New
- Give it a suitable name, in this sample configuration we'll call ut Buypass_TokenServer
- Preferred auth. method: select appropriate method (must be same as in RADIUS configuration on FortiGate)
- Servername/IP: IP address of the server where the Buypass Service Connector is running (in this sample configuration, BPSC is running on the Domain Controller)
- Port: 1812, Secret: must be same as in RADIUS configuration on FortiGate
Realms
- Go to Authentication → User Management → Realms → Create new
- Create a new realm pointing to your LDAP server
- Chained token authentication with remote RADIUS server: select the RADIUS server created in the previous step (Remote Auth.Servers)

Configuring RADIUS client
- Go to Authentication → RADIUS Services → Clients
- Client name/IP: the IP address of the FortiGate
- Secret: The RADIUS passphrase that the FortiGate unit will use
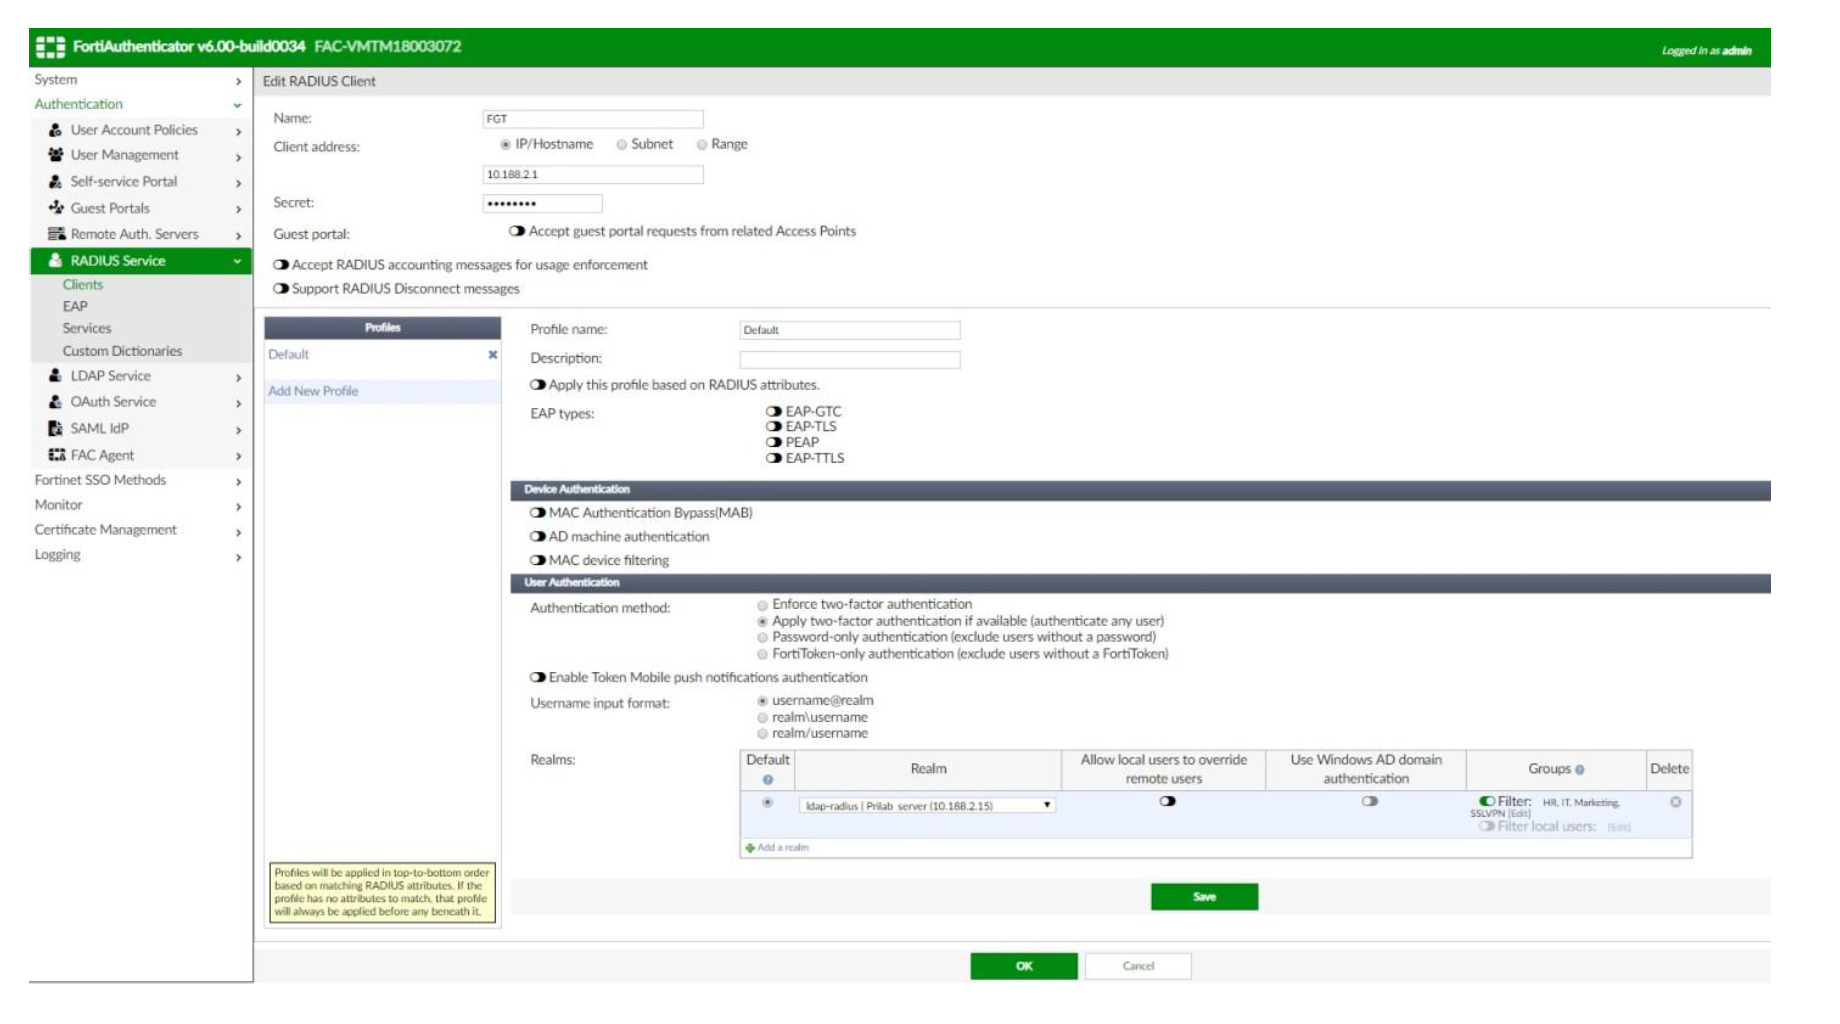
- Keep Default profile. User Authentication → Authentication method: Apply two-factor authentication if available (authenticate any user)
- Realms
- Select the remote realm we created in Realms
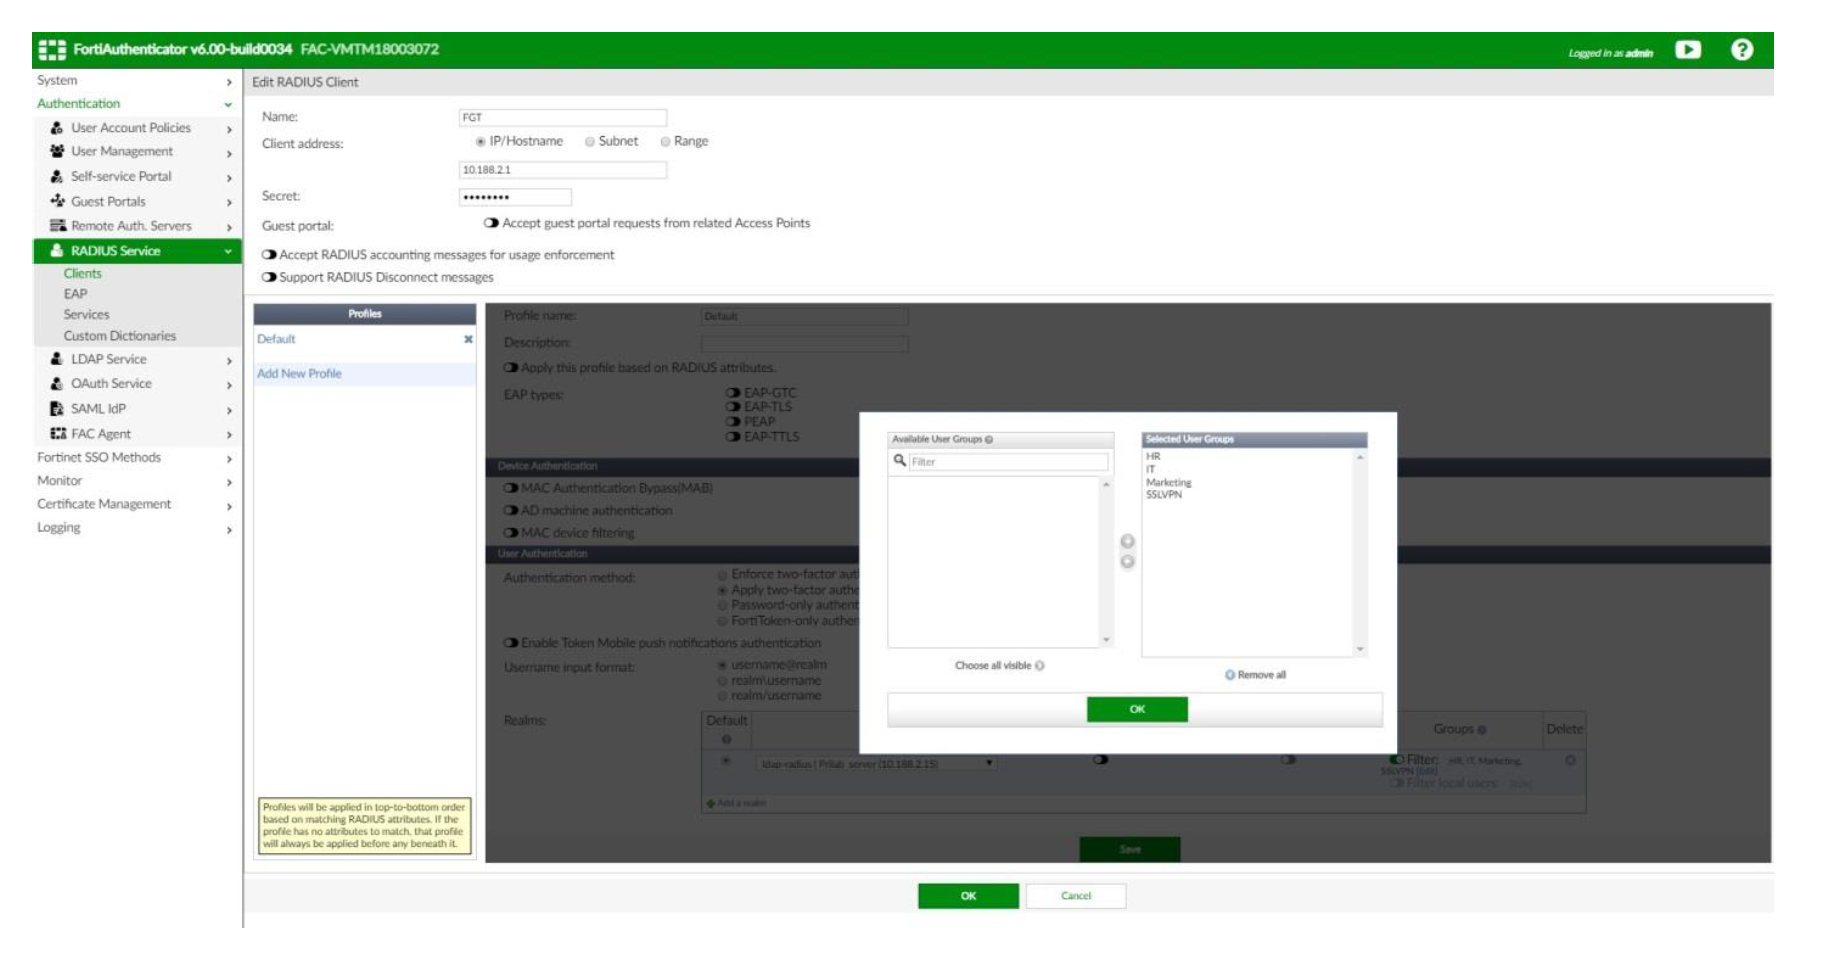
- Groups: enable filter and select the local group(s) we created in User Groups)
(no need to enable Allow local users to override remote user + Use Windows AD domain authentication) - Groups: enable filter and select the local group we created on User Groups. Save → OK
- Realms
Configure the FortiGate for RADIUS authentication
- Go to User & Device → RADIUS Servers and select Create New
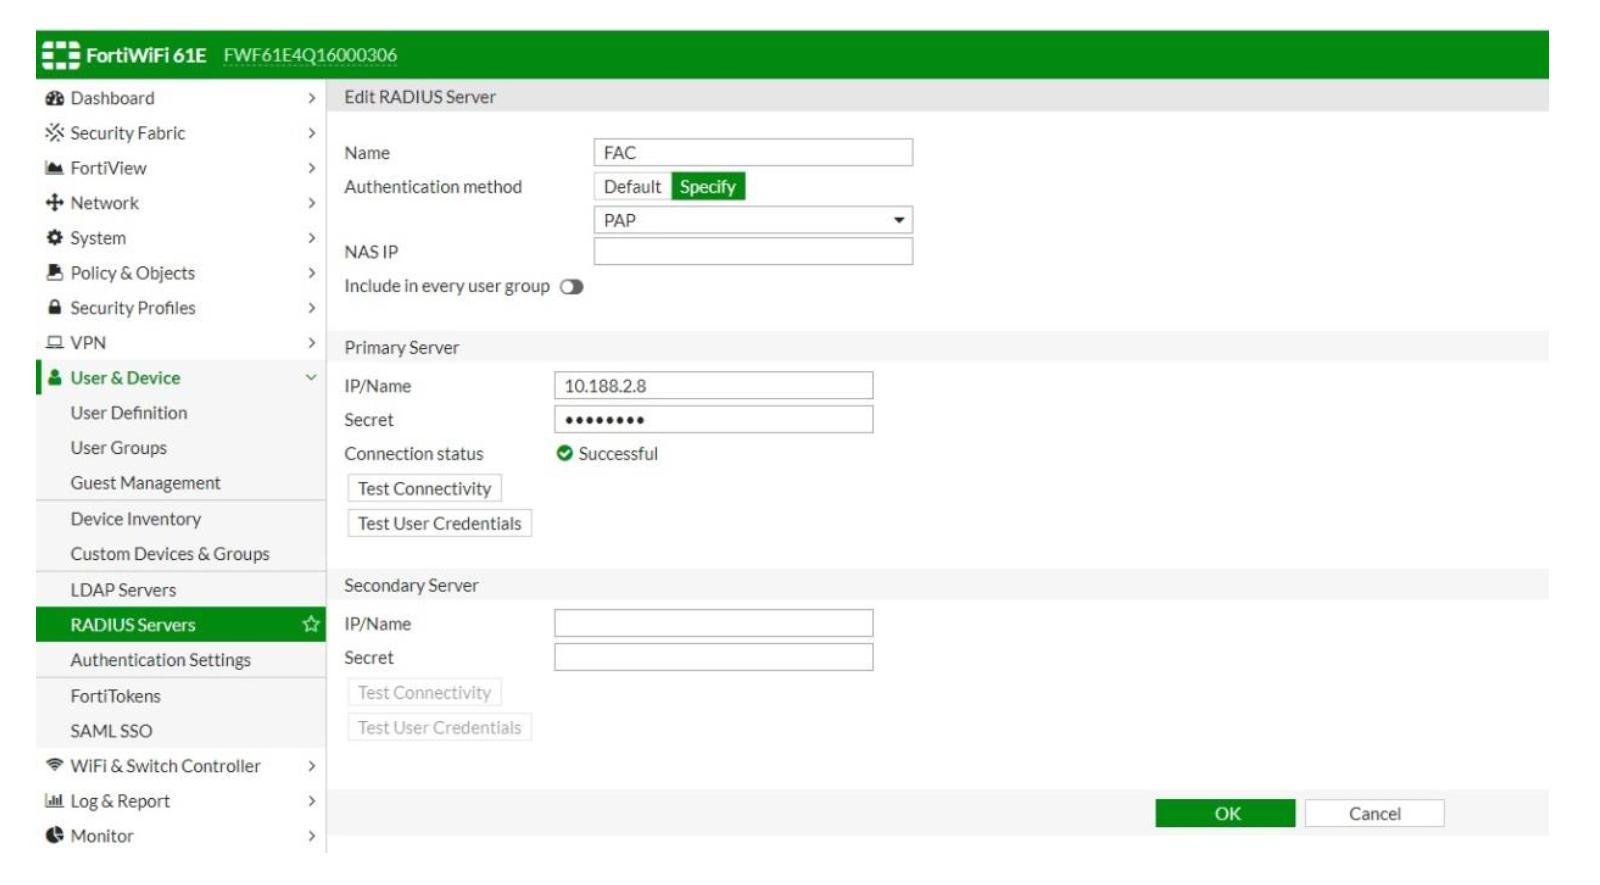
- Name: the FortiAuthenticator, on this case called FAC. Specify Authentication method and IP address of the FortiAuthenticator (FAC)
- Secret: same passphrase as specified for RADIUS Client configuration on FortiAuthenticator
- Test Connectivity: verify the connection between FortiGate and FortiAuthenticator
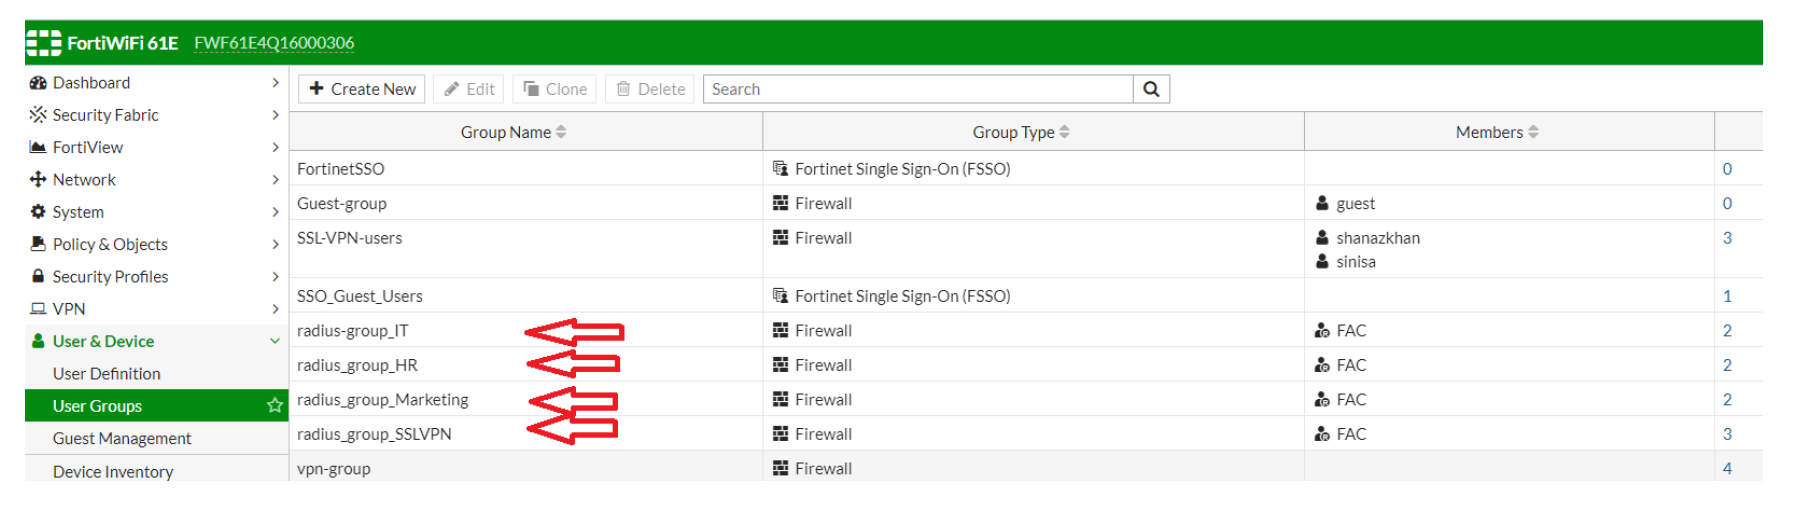
User Groups
We need to create local groups on FortiGate, corresponding to the groups created on FortiAuthenticator (HR, IT, Marketing, SSLVPN)
- User & Device → User Groups and select Create New
- Name: Give it a suitable name
- Type: Firewall
- Remote Groups → Add and select the remote RADIUS Server created previously (fac)
- Groups: Specify and give it a name (corresponding to FortiAuthenticator group name)
Note - By default this value is 'Any', and with this value, FortiGate will ignore radius attributes recieved. So in order to match attribute HR, instead of Any, select HR.
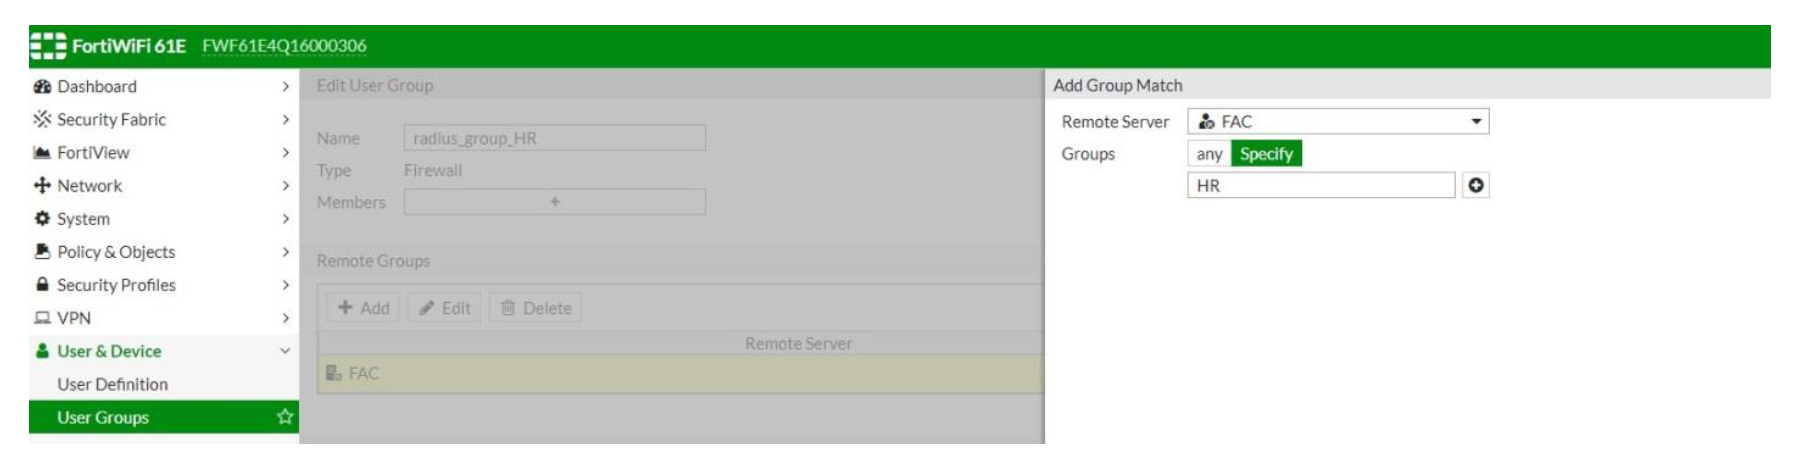
Now every user that arrives with e.g, an attribute 'HR' will be matched against radius_group_HR group.
Repeat the above steps for all necessary groups (in this case, HR, IT, Marketing, SSLVPN)
SSL VPN Settings
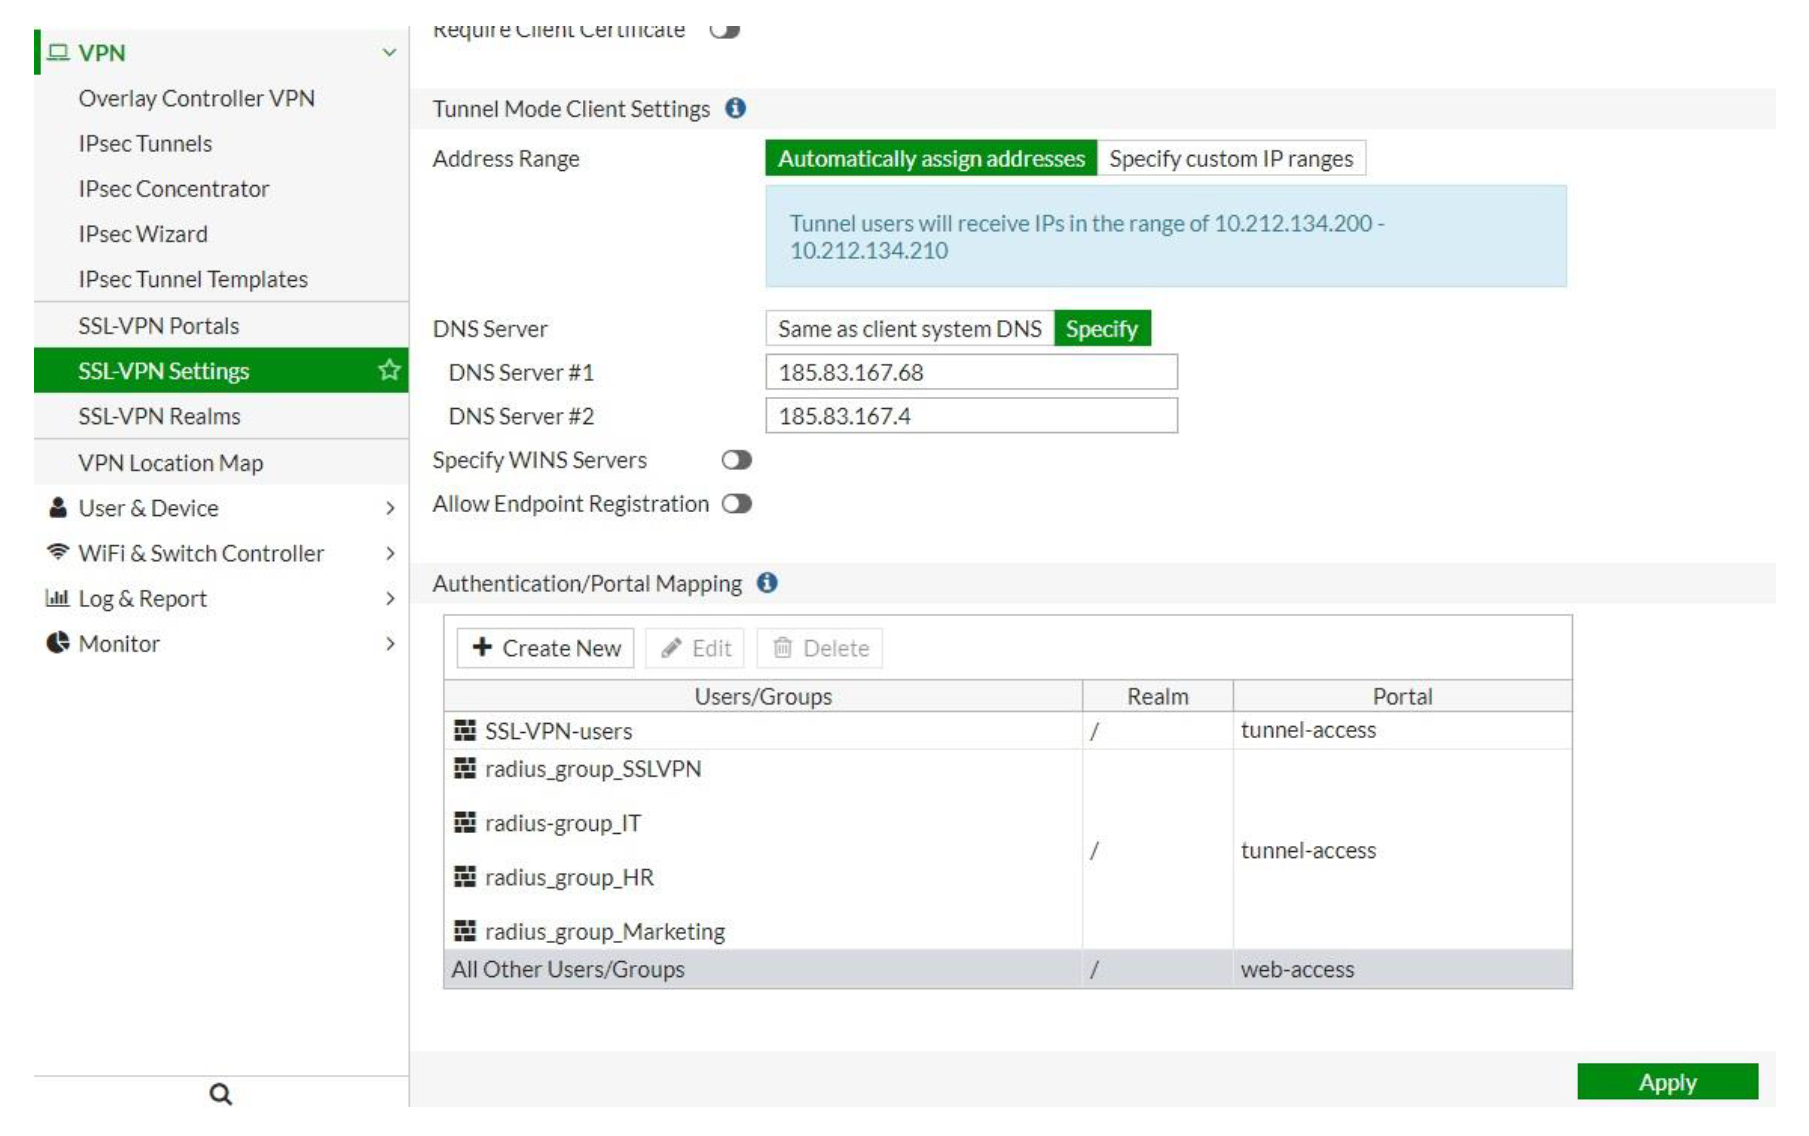
SSL → SSL-VPN Settings
- Specify Listen on Interface(s) - in this case wan1 + Listen on port 10443
- Restrict Access: Allow access from any host
- Tunnel Mode Client settings → Address Range: Automatically assign addresses
- Specify DNS Server(s)
- Authentication/Portal Mapping: Create new, select the necessary group(s), keep default realm and assign portal tunnel-access
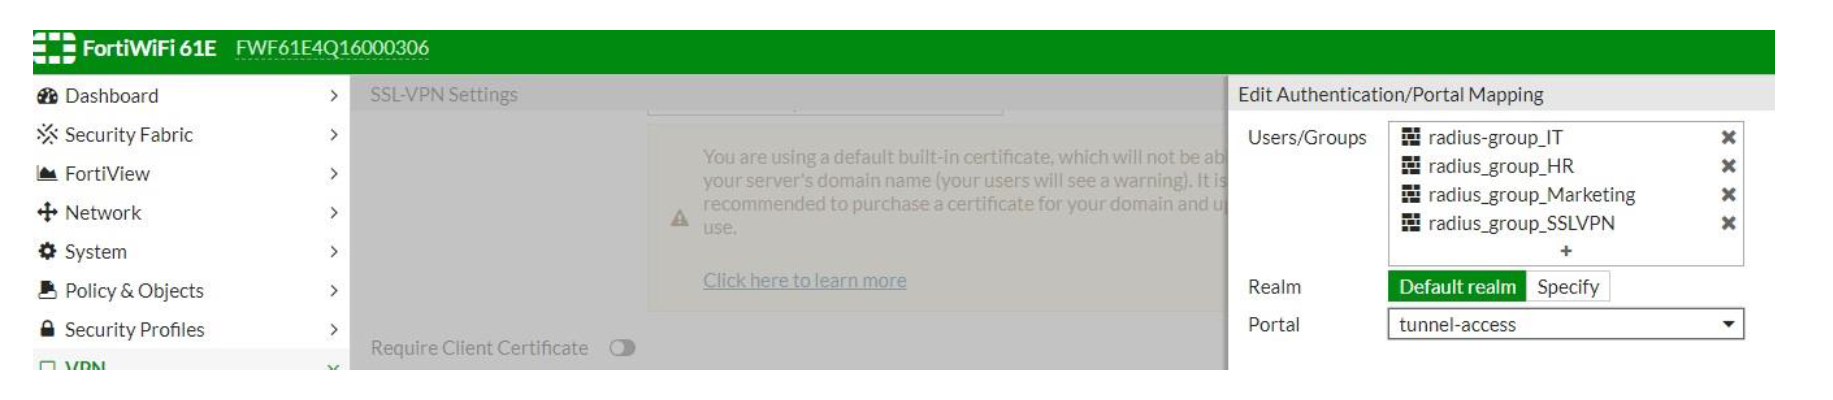
All the necessary groups will now show up in the Authentication/Portal Mapping windows:
SSL-VPN Portals
- Edit tunnel-access, make sure that Tunnel mode is enabled
- Enable Split Tunneling: when enabled, only traffic that matches the destination address in the respective policy will be routed through the tunnel. (In this case, split tunneling is not enabled as I wish to test users to also access internet through the tunnel).
- Source IP Pools: select SSLVPN_TUNNEL_ADDR1 (automatically created in the tunnel mode client settings)
Firewall Policies
- Create policies to grant access to your users connecting through SSLVPN. This is also where we grant users access to resources based on their group membership.
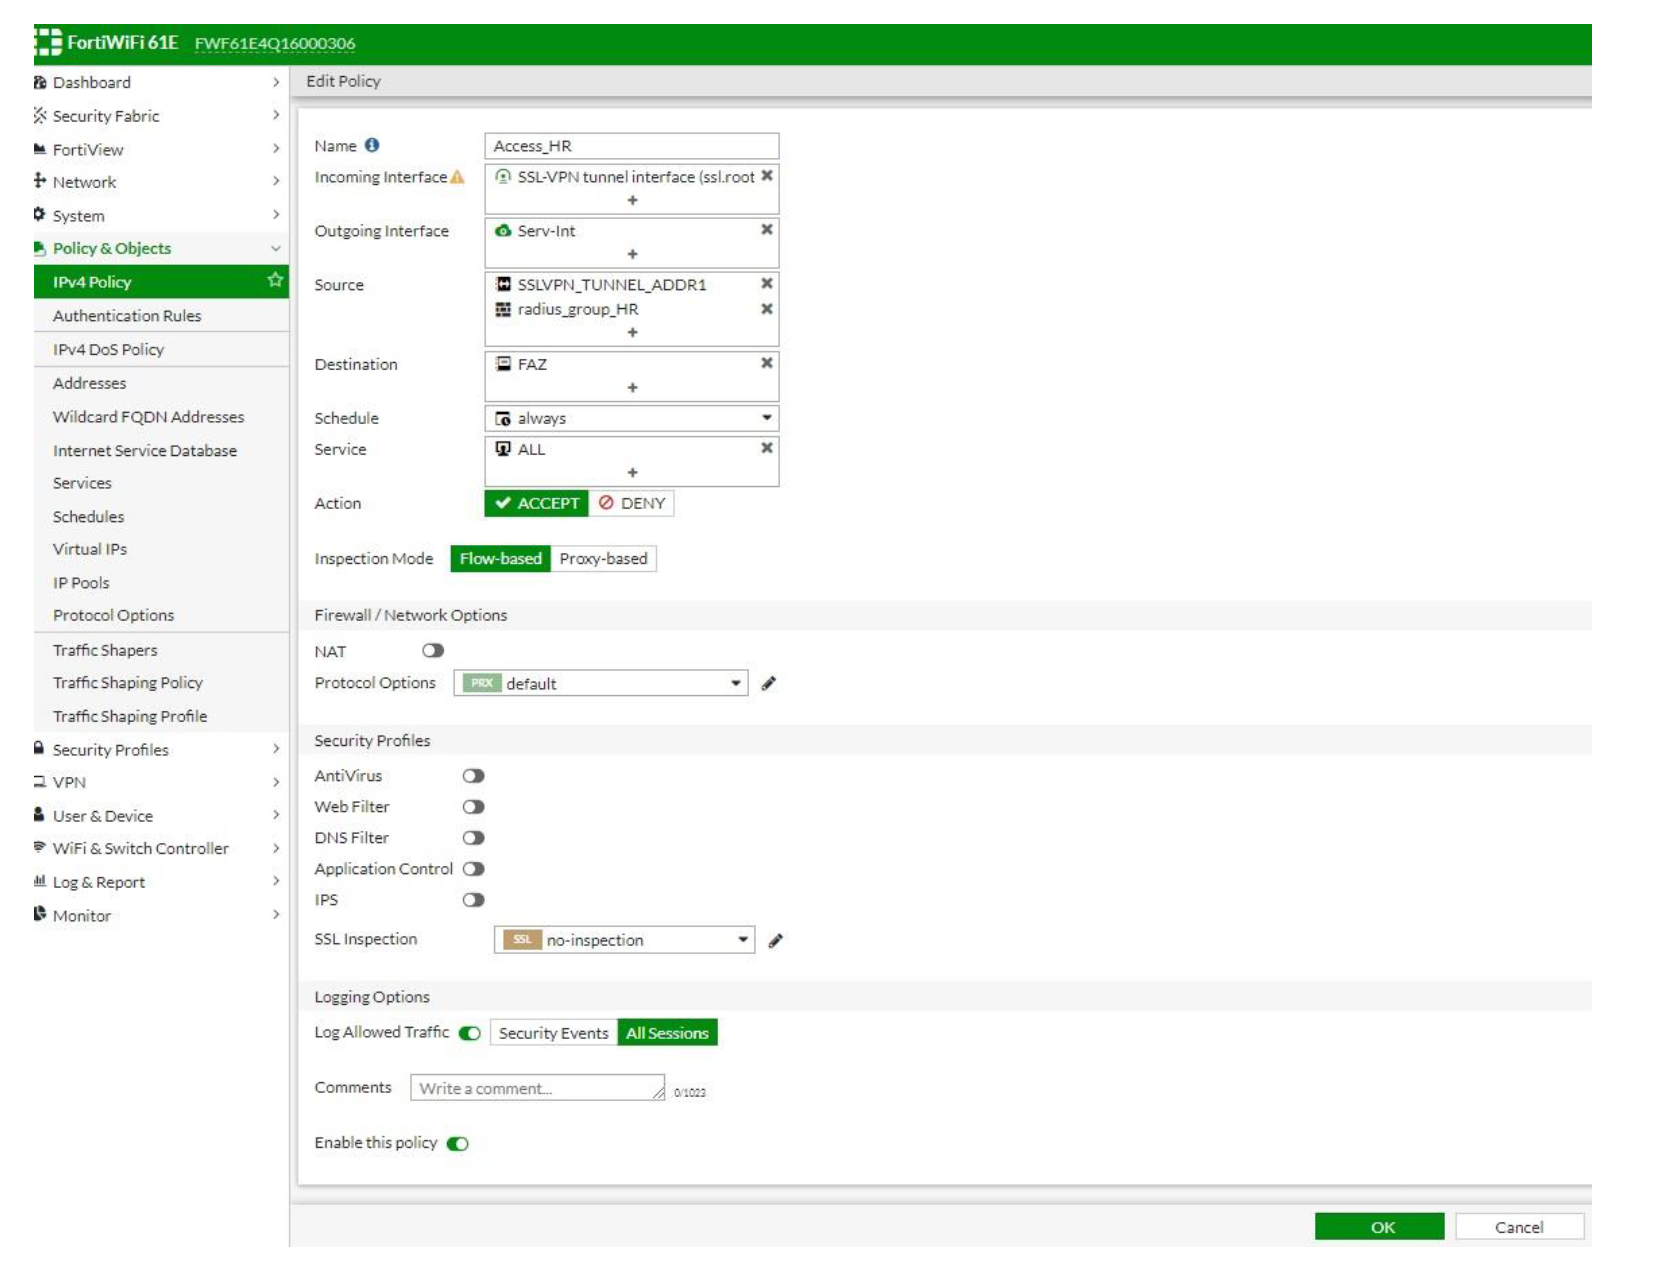
- Create a separate policy for each group, with the same Incoming Interface - SSLVPN tunnel interface (ssl.root). The differentiator will be the source groups we add on addition to SSLVPN_TUNNEL_ADDR1.

Testing
- Once you've completed the above configuration, you can test connecting a user to SSL-VPN, e.g. our test user dollyduck:
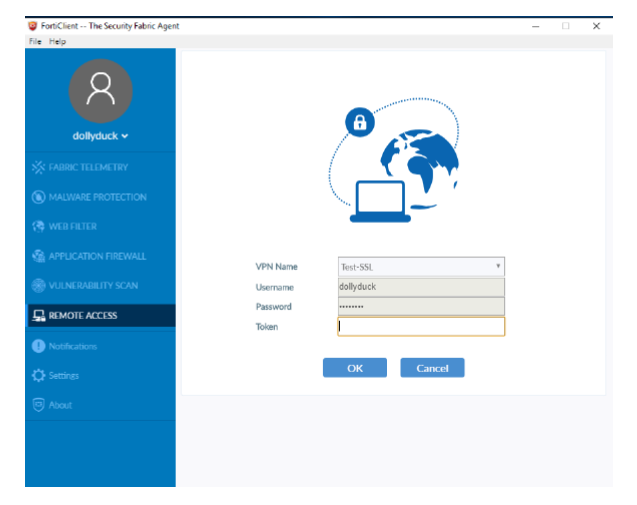
The test user is asked for Token after username/password. Buypass token code is typed and the test user connects successfully, as shown in FortiAuthenticator logs.
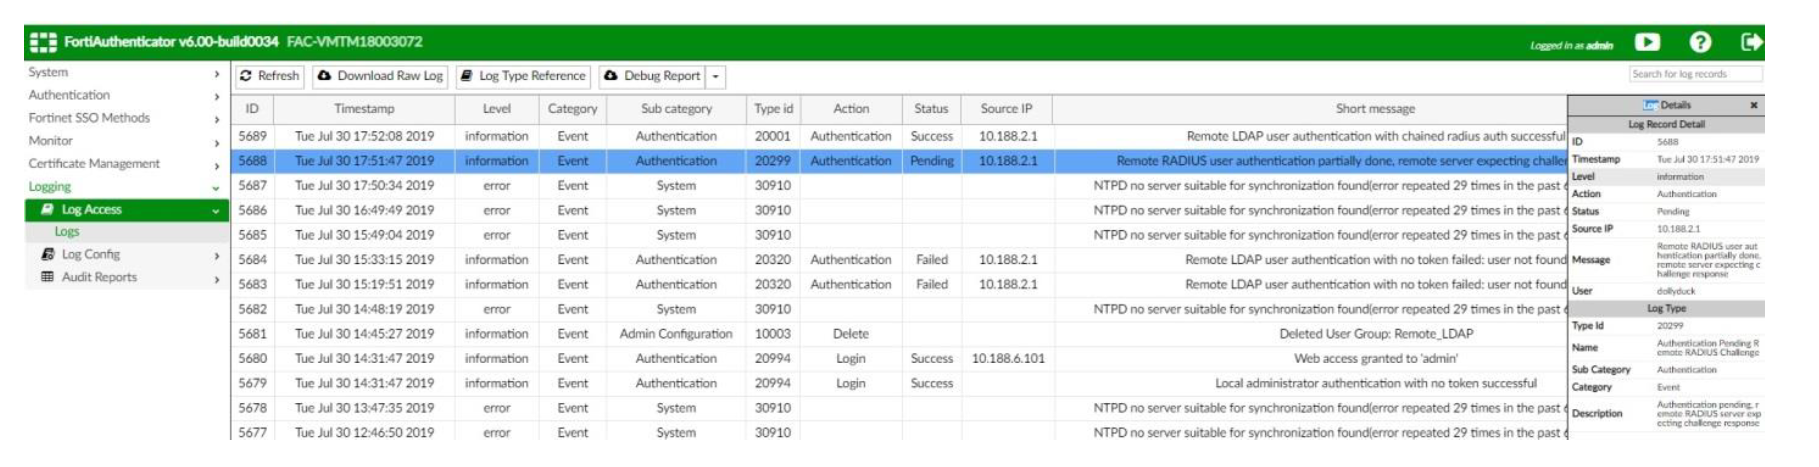
FortiAuthenticator Logs
- FortiAuthenticator logs shows successful connection.

- View log details. The detailed logs may also be useful for troubleshooting.
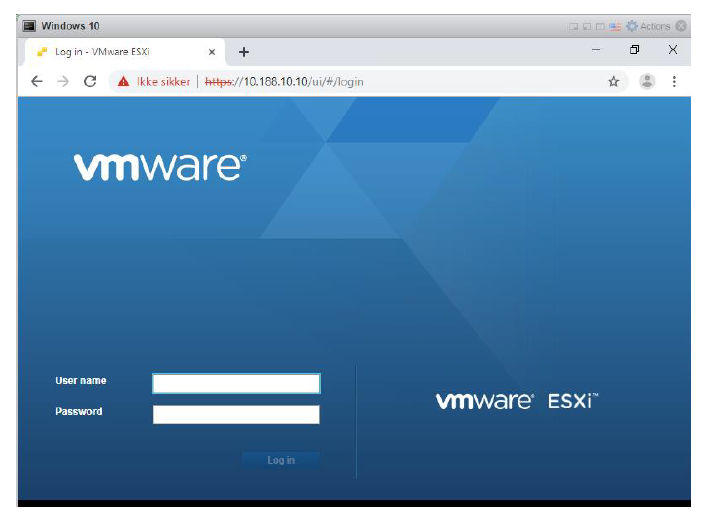
On the FortiGate, Monitor → Firewall User Monitor displays our test user as connected:

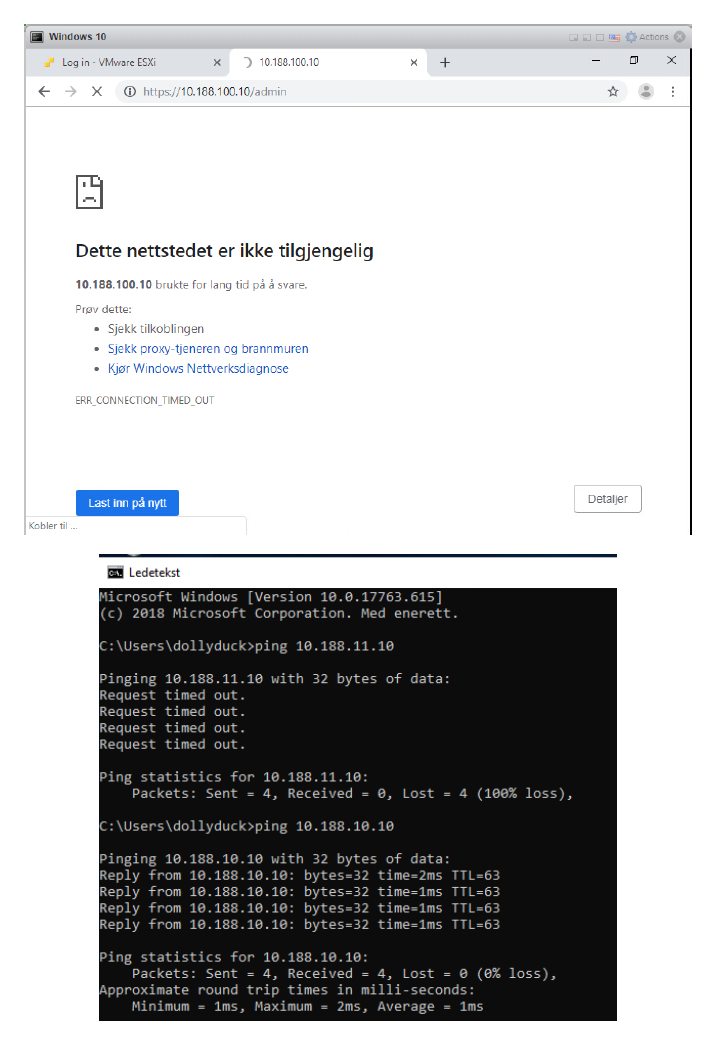
The test user may now access network resources according to defined security policies. In our sample configuration, test user dollyduck belongs to AD Group IT. Our FortiGate policies grant group IT access to the esxi server only:
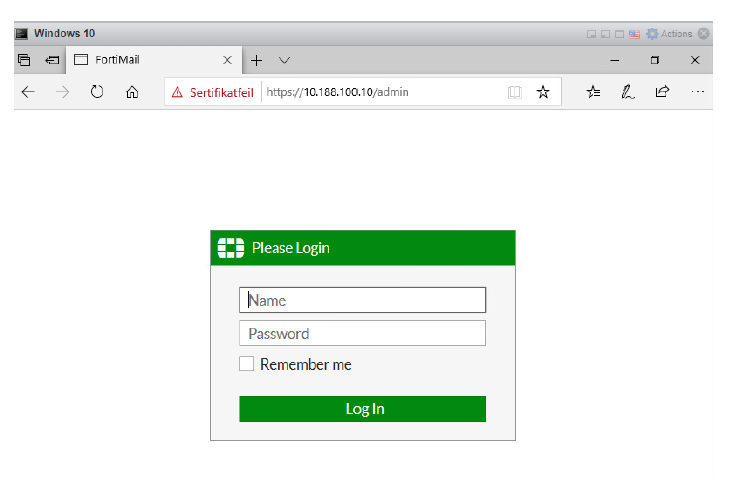
The test user is not allowed to access e.g. FortiMail (10.188.100.10)
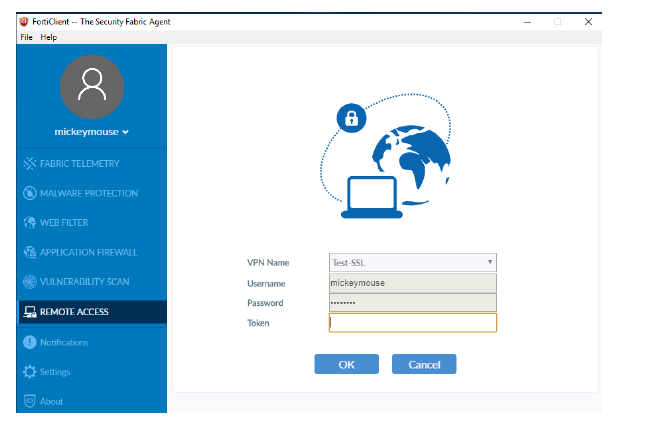
Let's test with a user belonging to another group, e.g. mickeymouse → group Marketing.
As with test user donalduck, this test user is asked for Buypass token in addition to username/password.
FortiGate, Monitor → Firewall User Monitor, displays our test user as connected.

Once connected, Test user mickey mouse has access to FortiMail, as per firewall policies.